Grampian Type 636 Operating Instructions
Grampian Type 636 Operating Instructions & Technical Specification reproduced into a searchable format.
The following has been reproduced into a searchable format from this original scan of the Grampian Recorders Instruction sheet and is for general information. Apart from fixing a couple of typos, they have not been altered or edited and we can accept no responsibility for the accuracy of the notes below. Any work undertaken on your Grampian should only be done by a qualified technician with experience working on this era of technology.
We’ve also done the same with the instructions for adding a wet-only (“direct signal path”) switch.
These were given to us to distribute and are free to use; however if you use, re-post or share them then please add a credit and a back link.
====
GRAMPIAN REVERBERATION UNIT, 636
INSTRUCTIONS
GENERAL
This instrument, intended for either amateur or professional use, employs a pair of mechanical (spring) delay lines with electromagnetic transducers to simulate the reverberant effect of a “live” hall. The delay lines have nominal transmission times of 29 and 37 milliseconds respectively. The lines are deliberately mismatched at their terminations to promote multiple reflections of the original signal, thus simulating the effect of two pairs of parallel walls (spaced approximately 32ft. and 41ft. apart respectively) reflecting sound waves. The total reverberation time (defined as the time taken for a sound to die away to 1/(10^6) of its original intensity) at 300 Hz is greater than 2 seconds.
There are two signal paths through the instrument; a direct path via which the unmodified input signal reaches the output, and the reverberation path described above, which embodies a separate gain or “reverberation” control. This enables the ratio of reverberant to direct sound to be varied from zero to approximately 1/1. A muting switch may also be connected in the reverberation path.
The direct signal path through the instrument has a flat frequency response over the entire audio band, but the response of the reverberation path is deliberately limited to 100 Hz – 6K Hz.
Two independent input channels are provided; a low level channel specifically intended for medium or low impedance moving coil or ribbon microphones, and a low or high level, high impedance channel which can accept a variety of signals from guitar pick-ups, high output crystal gramophone pick-ups, tape preamplifiers, etc., or from a bridging connection to a 600 ohm line.
The single microphone channel is arranged to accept either a balanced or unbalanced input connection, and embodies a novel variable negative feedback circuit which will accept the very large input signals associated with close microphone technique without danger of overloading the associated pre-amplifier.
The maximum output of the unit is one volt across 600 ohms impedance, which is more than adequate to feed the “radio” input of an average tape recorder, and may be fed through long lines with very little high frequency loss.
To achieve a good overall signal to noise ratio it is necessary to drive the mechanical delay lines to near their maximum capacity, and this is done by means of a 500mW push-pull, constant current, driver amplifier. The danger of overloading this amplifier is averted by the small pilot lamp which is situated in the output circuit and which serves as a combined overload indicator signal compressor and protective device.
The electronic circuits embodied in the instrument are fully transistorised; particular care has been taken to ensure minimum noise, and stability of gain over a wide range of operating temperatures.
Power supplies for the unit are derived from two nine volt dry batteries thereby eliminating mains borne interference, earth “loop” problems, and other sources of hum, while making the apparatus fully portable. A separate mains power unit is available if required.
It should be stressed that this instrument is intended to be used for improving the quality of recorded music and vocals – especially when recording takes place under abnormally “dead” acoustic conditions; and for dramatic effects – it is NOT intended to provide the “flutter-echo” effect associated with electric guitars on “pop” music recordings.
TECHNICAL SPECIFICATION.
INPUTS
Two independently controlled input channels are provided, one for 25 ohms microphones, and the other for high impedance signals.
Microphone Channel :-
Connection: Balanced or Unbalanced lines via two alternative standard jack sockets.
Matching Impedance: 25 ohms. (600 ohms to order)
Sensitivity: 20 µV across 25 ohms
Maximum level: 25 mV.
Aux. Channel:
Connection: unbalanced via two standard jack sockets.
Matching Impedance:
(a) 50 K ohms
(b) 1 Megohm
Sensitivity:
(a) 10 mV
(b) 500 mV
Maximum Level:
(a) 300 mV
(b) 15 V
OUTPUT
Connection: Unbalanced, via standard jack socket.
Direct Path Program level: (Reverb. off) at rated input -8dbm (= 300 mV) Source Impedance: 600 ohms.
Absolute Maximum level: + 2dbm (= 1 volt).
DIRECT PATH GAIN:
Mic Channel: 72 db (86db voltage gain) maximum.
Aux. Channel:
(a) 52 db (32db voltage gain) maximum.
(b) 30db (-2db voltage gain) maximum.
Frequency Response: ± 2db 35 Hz – 20K Hz on all inputs.
Gain Control Interaction: Less than 1db.
NOISE:
Both channels closed: -68 dbm at output.
Reverb. fully on.
Aux. channel open terminated in 50K ohms.
Reverb. fully on: -63 dbm at output.
Both channels open correctly terminated.
Reverb. fully on: –45 dbm at output.
Noise Factor of Mic. Channel: less than 5db, 400 Hz to 10K Hz
DISTORTION.
Less than 1% Harmonic content at maximum input and output levels. Reverberation off.
REVERBERATION PATH.
Delay Times: 29 and 37 milliseconds nominal.
Reverberation Time: 2 seconds at 300 Hz.
Frequency Response: 100 Hz to 6K Hz ±3db (averaged at 100 Hz bandwidth).
Direct/Reverb. Ratio: 1/1 maximum.
Overload Indicator: 6.5 volt, 1 watt L.E.S. panel lamp.
Remote Switch: Mutes reverberation, connected via standard jack socket, isolated from earth.
POWER SUPPLY.
Two 9 volt dry batteries, Ever Ready type PP9 or equivalent.
Consumption:
25 mA idling.
150 mA on full drive.
50 mA average on speech and music.
CONTROLS.
Three rotary controls (numerically calibrated) for Mic. gain, Aux. gain and Reverberation, together with overload indicator lamp, and on/off switch, mounted on vertical front panel.
CONNECTIONS.
6 standard jack sockets grouped in pairs on top of the instrument.
OPERATING TEMPERATURE: 0° – 50° C.
TRANSISTORS.
2 – 2N2613
2 – 0071 or 2N2614.
3 – 0045 or 2N2613
1 – 0081D or AC128 or 2N2614
2 – 0081 or AC128 or RCA40253
SIZE Approximately 17.5” x 5.5” x 6.25” overall
WEIGHT 12 lbs, complete with batteries and lid
FINISH Grey Vinyde covered wooden carrying case with lid. Panel finish satin silver and eggshell black.
PLUGS SUPPLIED
2 standard jack plugs (BS.666)
1 T.R.S. jack plug (G.P.O. type)
Circuit Description
All components with the exception of the overload indicator, controls, and input/output connectors are mounted on a single printed circuit panel.
As far as possible all transistors are grouped in d.c. feedback pairs to stabilise working points, and extensive use is made of a.c. negative feedback to ensure constant gain despite temperature variations and transistor spreads. This feedback also serves to reduce distortion and achieve the desired circuit impedances.
The arrangement of the microphone channel input jacks is such that inserting the appropriate plug automatically connects the primary of the mumetal screened microphone transformer for balanced or unbalanced input. The microphone preamplifier consists of a d.c. feedback pair with the input transistor biased for low noise operation. Shunt and series a.c. feedback is applied overall to stabilise
the amplifier input impedance and this feedback is varied inversely with the setting of the gain control at the output, so as to accommodate a wide range of input levels, without resorting to noisy high-current operation of the input transistor.
The auxiliary channel pre-amplifier is an emitter – follower stage providing a high input impedance, followed by a gain control. The input impedance at the high level input is still further increased by a resistor.
Outputs from the two pre-amplifiers arc mixed and fed to the buffer splitter amplifier. This amplifier divides the signal between the direct and reverberation paths. It consists of a d.c. feedback pair with shunt a.c. negative feedback to reduce the input impedance and hence prevent interaction of the pre-amplifier gain controls. This feedback, together with the direct-path output is derived from the emitter of the second transistor. The reverberation path output is directly coupled from the collector of this transistor to the base of the spring driver amplifier input transistor.
The spring driver amplifier is a conventional 500 mW single-ended push-pull class B power amplifier, transformer driven from a class A common-emitter stage.
Collector-base H.F. feedback is used on the class A stage to curtail the reverberation path frequency response, while series fed overall feedback ensures the desired constant current spring drive. Overload protection is by a small indicator lamp connected in series with the spring unit drive coil. The “remote switch connection short circuits this coil, muting the reverberation path.
The output signal from the spring unit is fed via the reverberation control to the output amplifier, where it is mixed in series with the direct path signal. The output amplifier consists of a d.c. feedback pair of which the first transistor is biased for low-noise operation. A.C. negative feedback is arranged to be fed in series with the reverberation path input and in shunt with the direct path input. This raises the reverberation path input impedance and prevents loading the pick-up coil, while lowering the direct path input impedance to prevent signals being transmitted back along the direct path.
The output impedance of this amplifier is determined largely by the collector load, and the resistor across the output jack prevents the leakage current of the coupling electrolytic disturbing the bias of any subsequent amplifier.
CONNECTIONS. Mic. Input. The output impedance of the microphone should be 25 ohms (600 ohms for instruments to special order) and it should be connected to the unit via twin screened cable. It is preferable to use the balanced input connection, as this reduces the likelihood of hum or interference being picked up by the microphone cable. The output of the microphone (i.e. the two inner conductors of the cable) should be connected to the “tip” and “ring” connections of a standard G.P.O. type “tip ring and sleeve” jack plug; while the screen is connected to the sleeve.
For unbalanced connection (where one microphone output lead is connected to the screen) a standard (B.S.666) jack plug should be used; again the screen should be connected to the sleeve.
The balanced and unbalanced input sockets should not be used simultaneously.
Aux. Input. Connection should be made via a screened lead and a standard (B.S.666) jack plug to the “10mV” or “500mV” input sockets as required. The screen of the cable should be connected to the sleeve of the plug.
The Aux. input sockets will accept any signal of a suitable level, from a source impedance less than that shown on the panel of each socket, e.g. the 500 mV, 1 MΩ socket is suitable for tape recorder outputs, high output crystal gramophone pick-ups, 600 ohm line bridging etc., while the 10mV, 50K ohm, socket is suitable for most guitar pick-ups etc.
Care should be taken not to feed large signals into the “lOmV” socket as this will overload the pre-amplifier and cause distortion.
Remote Switch. This should be a good quality toggle or press-action single pole switch, connected to the “Remote Sw” socket via a length of heavy twin lead and a standard (B.3.666) jack plug. It is important that the total resistance of the switch and lead does not exceed one ohm, otherwise the reverberation will not be completely muted.
The reverberation is OFF when the switch is CLOSED
N.B. Care should be taken that the connections to the switch are insulated from earth. Earthing these will light the overload indicator and prevent the instrument from functioning properly.
A suitable foot-operated switch lead and plug attached is available as an accessory.
Output. Connection should be made to the output socket via a standard (B.S.666) jack plug. The sleeve of the plug is earthed. A screened output lead is not necessary under normal circumstances. The output of the unit should not be connected to the microphone input of an amplifier liner or tape recorder, since this will almost certainly overload the input circuit. The equipment may, however, be connected to any equipment having a high level input of impedance 600 ohms, or greater.
Should a balanced connection be required an external transformer must be used.
Batteries. The instrument uses two 9 volt batteries, Ever Ready type P.P.9 or equivalent.
Access to the battery compartment is obtainable by releasing the two 2BA case retaining screws at the rear of the unit, and withdrawing the chassis from the case.
Battery life depends very much on the conditions of use, but the batteries should be checked at intervals, and when the terminal voltage of either one (with the instrument switched ON) has fallen below 7 volts they should both be replaced.
OPERATION.
Setting the controls. The unit will operate immediately it is switched on, The appropriate gain control should be turned clockwise until the overload indicator lights. It should then be turned back until the indicator just glows intermittently on the very loudest sounds. The amount of reverberation added to the signal may then be adjusted by the Reverberation control. Turning the control clockwise increases the amount of reverberation, and with the control set at ‘0’ no reverberation is added. The control may be left in any desired position and the reverberation switched on and off by remote switch connected as described above.
If, with the controls set as described above, the output of the system is too loud or too soft, or if, in the case of a tape recorder the recording level is incorrect, then the gain control of the amplifier or recorder following the reverberation unit should be adjusted, NOT the gain control of the unit.
This means that, in the case of the recorder, the maximum recording level is adjusted to correspond with the overload point of the reverberation unit. The system is now “lined up.
With the system adjusted in this way any further adjustment to accommodate changes of input level from a microphone etc., should be made to the gain control on the reverberation unit; so that neither reverberation unit nor recorder is over-loaded.
The correct setting up procedure is important. If the unit is overloaded distortion will be heard when the reverberation is turned on; and if the input is too weak the unit will produce “hiss” and be sensitive to mechanical vibration.
Position in system. Though it is theoretically possible to connect the reverberation unit almost anywhere before the power amplifier in a reproducing system, or before or after a recorder in a recording–reproducing system, certain practical considerations make the choice of position important. Among these are:–
It is rarely desirable to add reverberation equally to the sound from a number of musical instruments, vocalists etc, – an example of this is the use of reverberation to give “body” to a vocalist while retaining the original musical backing.
To do this it is necessary to connect the reverberation unit into a microphone channel used for the vocalist only and mix the output of the unit with that of the microphone channels used for the backing.
In applications involving professional mixing equipment with “echo send” and return facilities, the direct path in the reverberation unit is not required.
A switch can be fitted to the type 636 (as a Factory modification) which cuts
off the direct path within the instrument, but normally for these applications we recommend the use of the Grampian type 666 unit which has no–direct path, but is mains powered and has input and output terminations intended for connection to either mono or stereo mixing consoles.
(2) If too much reverberation is added when making a recording it cannot be removed. It is sometimes desirable therefore to record material “dry” and add reverberation during playback or re-recording.
(3) For Stereo use, two direct paths are required and reverberation taken from each channel must be injected into both. It is not generally satisfactory, therefore, to use separate Reverberation Units, one in each channel.
In its present form the Grampian Reverberation Unit 636 is not suitable for stereo use.
POINTS OF GENERAL IMPORTANCE.
1. Echo. This is a single reflection of sound.
Flutter echo. This is a multiple reflection of a sound which can be heard as a series of distinct separate echoes.
The Grampian Reverberation Unit will not produce these effects.
Reverberation. This is a series of multiple reflections of a sound which is heard, not as separate echoes but as a re-enforcement of the original sound, as in large halls, churches etc.
The Grampian Reverberation Unit will produce this effect.
2. Reverberation can strengthen a weak solo voice when used in moderation, without causing a “hollow” sound.
3. Reverberation on large groups of musical instruments producing complex sound is usually unpleasantly confusing.
4. The Remote Switch facility on the unit can be used to switch on and off reverberation with very dramatic effect.
5. If in doubt, use too little rather than too much reverberation (rarely more than ‘4.’ on the control), especially when recording – it cannot be removed, but more can be added later.
==========
This page is part of our collection of resources on the legendary Grampian Type 636. Read more about this remarkable unit and see all the information we have gathered over the years here. We’re fanatical about these units and sound they can produce if restored to full functioning – if you are looking for one of these units, or have one to sell in any condition, please get in touch.
Related Posts

Amplify Your Studio Budget: Lock In 2025 IRS Deductions Now

Tascam M-208 & M-216 - How to Add Direct Outputs

Soundgas LFOmo Manual

Soundgas Type 636 Manual
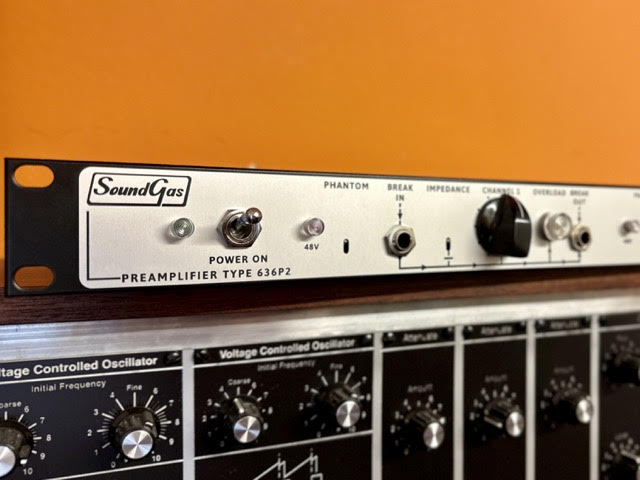
Soundgas Type 636P2 Manual

Zero Head Gain Roland Tape Echoes

Soundgas Type 636P Manual